“Webforms” is a Drupal module included with your Open Y website. It is a powerful & flexible FORM BUILDER, that can be as simple or complex as you want it to be.
The first thing we think of when it comes to Webforms, or using a form on your website, is a “Contact Us” form. This is, of course, a true use case. We usually think of it as “my users have an issue, they need to fill out some fields and get an answer”. That’s selling Webforms WAY too short.
Think of Webforms in a new way. In a more general sense, the Webform module is Open Source and allows your website to collect data. But even that sounds too technical to me.
I like to explain it this way … think of webforms as “A way for your team to gather information from your website visitors.” That’s a bit wider perspective, right? And a much more fun one, too.
As marketing people, you have a crazy powerful tool, built right in to your Open Y website, that’s just waiting to gather all sorts of information – and maybe even trigger all sorts of marketing processes. Like I said … FUN!
This is a Webform.

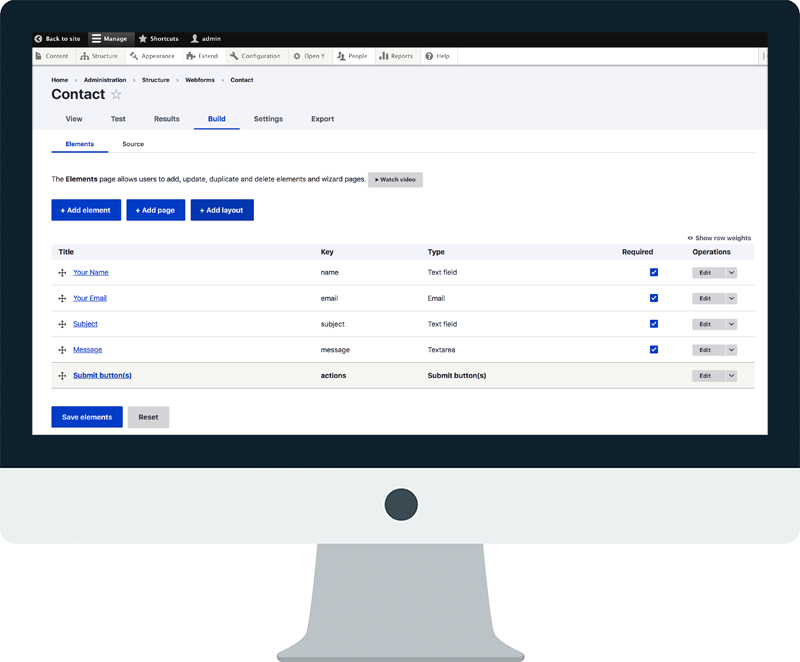
This is the Webform Builder.

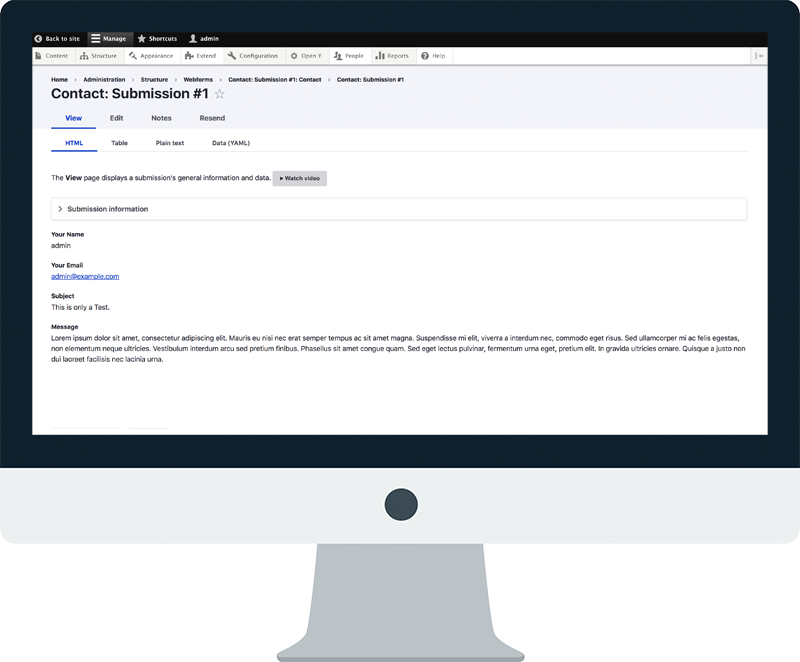
This is a Webform Submission.

Why Does That Matter?
It means that plenty of people have ran into the same issues you might run into, and have created some pretty incredible ways to use Webforms. It’s easily one of the most well documented modules in the entire Drupal ecosystem.
Here are a few resources to get you started learning on your own, if you’d like:
Webform Introduction:
https://www.drupal.org/docs/8/modules/webform/webform-introduction
Tutorials for Form Builders:
https://www.drupal.org/node/2834425
Webform Cookbook:
https://www.drupal.org/docs/8/modules/webform/webform-cookbook
FIRST THINGS FIRST:
Webforms / Webforms UI
ITEM 1:
Where are Webforms found in Open Y?
“Structure > Webforms”
There you go! Good Luck! Just kidding.
ITEM 2:
How Do I Build My First Form?
- Elements / Pages / Layouts
- Elements are essentially the “Fields” that you place in your form.
- Pages allow you to create “multi-step” forms.
(Think longer forms – Camps. Personal Training. Financial Assistance.) - Layouts allow you to display fields inline, instead of the default stacked view.
- Take a look at the Tabs up top. Quickly:
- Test. This allows you to test your form without having to fill out a test form each time & it won’t “track” the submission.
- Results . This is where you’ll find actual submissions once the form is “live”.
- Build. The bread & butter. This is where you … well … build the form.
- Settings. You can get lost in here. It’s all the settings for your form. If you ever ask the question, “Can my form do ….” go ahead and check this tab.
- Export. YES! You can export your forms! This opens up a whole world – which we’ll talk about later.
- Clone. Ignore 🙂
- NOTE: Each tab has sub-tabs, just be aware.
Again, Webforms is a very big module. Lots of boring docs.
Focus on the basics here. “BUILD!”
ITEM 3:
What Kind of Elements Can I Have?
- There are dozens. When in doubt, search for it!
- The Majors:
- Text field
- Textarea
- Date (Birthdays)
- Options Elements
- Checkboxes (multiple options)
- Select (dropdown)
- Radio (unique option)
- “Other” Variation on each of those.
- Create a quick “Schedule a Tour” form.
- Make sure to use a “Select” field for Locations.
- Don’t forget your Captcha field!!
- Others to mention, if time:
- Phone
- Composite Elements (can speed things up, can created headaches)
- “Prebuilt Options Lists” for Options Elements! (time saver)
ITEM 4:
How Do I Make My Form Visible to the World?
Each webform will become it’s own node, which can be linked to from another page with a text link, button, or even from a menu item placed in the nav. This does not give you much control.
My recommendation is that you only place webforms on existing pages, using the “Webform paragraph” built in to Open Y.
> Create a Landing Page / Edit existing Page
> Add Paragraph to Content Area
> Add Webform
> Choose your Webform
This gives you more control over the page itself, and allows you to build around the form just like you would a normal page in Open Y.
…
FINAL REMARKS
>> Mention Webforms Templates / Webform Examples <<
(optional modules)
>> If all else fails, throw a question in the Slack channel,
we’re all here to help and to learn from one another! <<
[ HAND OVER TO DAVID ]
…


